Tuesday, September 30, 2008

Wardle Reunion 2008


I think Johnny put about 10k miles on
this dump truck during the trip.

Merlin (yes, the one from the 70's) is the
most advanced electronic entertainment
we allowed on the trip. :)

No matter how hectic your toy truck playing becomes,
never forget to stop and pick the dandelions.

Shangrila, courtesy of Cabela's and Sam's Club. And others.

If you watch this subversive long enough,
you might get the idea he's got a thing
for baseball.

The outdoor shower has gotten progressively less
craptacular over the years.

Patty!!!!

I don't know these ruffians. Yes, I'm sticking with that story.

Grandpa watching the grandkids speeding by.

A new look for Emily. It didn't last long.

Meagan trying her best to pout for the camera.

These slackers refused to clean the fish.

Johnny finds a use for the screen enclosure around the
trailer awning.

Emily figuring out which way is up.

Meagan performs for the reunion amateur hour--
ouch! I mean, um, talent show.


Sunday, June 1, 2008

New Backyard Playset


The predecessor play set, which we've
dragged around since we lived
in Colorado.

Pine lumber, pressure treated, rated
for ground contact. And a lot
of it.

Cutting all the pieces took the better
part of a Saturday.

Each piece labeled to indicate
what part of the structure it goes to.

Rounding the edges of all the lumber
using an edge router. Each piece was then
sanded using a random orbital sander.

Applying a semi-transparent redwood
sealant to the wood prior to construction.


Leveling a 10' x 6' area for the base
of the fort structure.

Raising the basic frame

Decks and lower ladder...
Safety boards and tarp boards...

Railing done and adding the swingset beam

There are a total of 3 slides to be
installed. The yellow one is a 14' scoop.

Installing the first roof tarp, the 10' scoop
slide visible to the left (green).

The third, final, most expensive,
and most problematic slide, finally done.

All done! (For now.)

Some sort of clubhouse enclosure will be
added below the upper deck, but for
now it's playable and daddy's resting
from these labors for a while.

Tuesday, May 13, 2008

FHE Idol

(And yes, I had to bribe Joseph with a trip to Braum's)

Saturday, May 10, 2008

Another Saturday, Another Load of 2x4s

This week, we made a work bench and a set of shelves for the other side of the garage.

Fairly basic work bench, 16" deep shelf below with a backstop,
work surface made of 2 layers of 3/4" plywood laminated together
with Elmer's carpentry glue and a lot of screws.
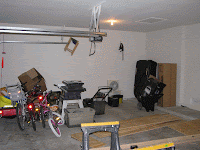
You may note the considerably cluttered garage area behind it,
which is where the shelves are going.
Actually, Stephanie had already done a lot of clearing away
stuff to get it this good...

Hooray! Now we can see the east wall!

The cleats installed along the east wall

Vertical supports and top plate added

Horizontal supports and south wall cleats done

Shelves (3/4" plywood) cut, notched,
and installed with glue and screws

A few custom-sized spaces now occupied...

A bit more stuff to add to complete the
organizing of the garage, but this
is a nice step in the right direction.

Saturday, May 3, 2008

4 Easy Steps to Burn a Saturday

Step 1: Bag the ambitious plans for the adjustable shelves
involving gang-routing slots through banded sets of 2x4s
and instead go for the laddered utility shelves (i.e. - the
ones you have a snowball's chance of finishing in one day).

Step 2: Chamfer the rear top plate so thatyour cable TV still works,
install the cleats to support the rear of the shelves, and
add the front vertical beams.

Step 3: After all shelf supports are installed, dry fit the 3/4" plywood
shelving before installing them with Elmer's carpenter glue
and securing them to the supports with screws.

Step 4: All done. Then the wife put a bunch of her stuff on the shelves
and went shopping with Meagan.